For this face I chose to start with the corner of the block facing me

 Next draw in a wide square nose & connect the lines to draw on the sides of the face
 Draw on the hair, for this example I chose kind of crazy hair
 Using a chainsaw- Cut out around the hair & a triangle from under the chin
 Back to the Face bit– Remove the material around the nose & under the brow. (leave the nose protruding)
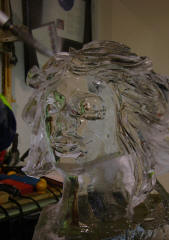
 Push the forehead back, leaving only the brow & nose sticking out.
 Use the side of the bit to taper the cheeks in.
 Use the side of the bit to make the head narrower where the eyes are. (Just a little dimple right next to the eye)
 Use the face bit to rough in the eye. Start the eye by creating a 1/2 cylinder
 Do both eyes, focus on making them the same level & size
 Carve back the area next to the mouth
 Close up of previous step
 Using the top of the face bit, shape the eye. you can even make eyelids with the tip
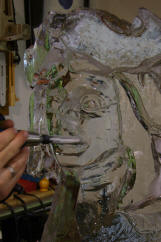 Carve the mouth, & tuck the lower lip under the upper lip in the cormers